To get a new look for the kitchen just a change in lighting can work wonders.
Tools required for updating old kitchen lighting
Drill & Srews
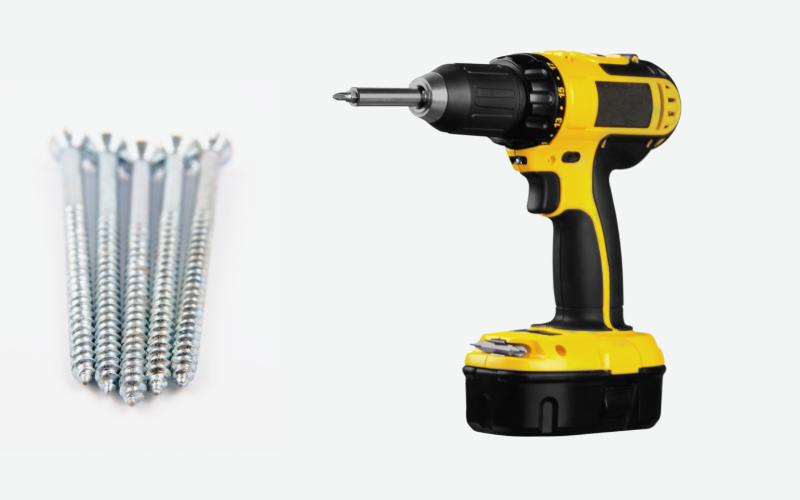
A drill and screws are required for installing drywall.
Size of the screws = 5 inches.
Drywall
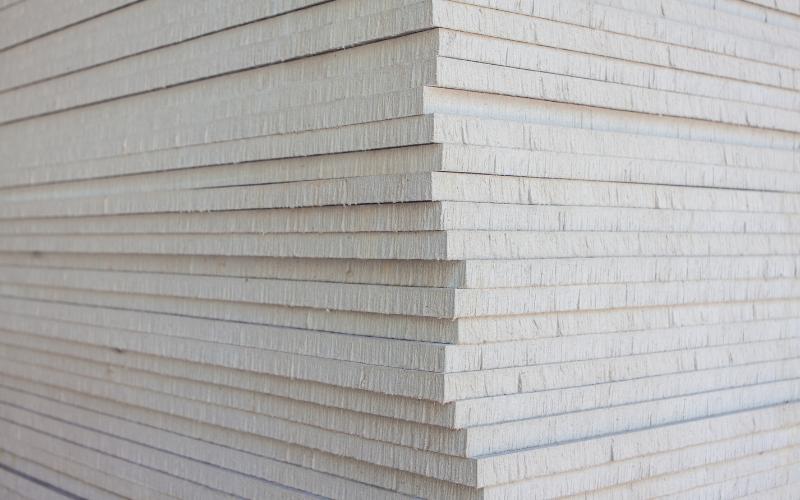
Thickness of drywall = 0.5 inches
Measuring tape
Multimeter
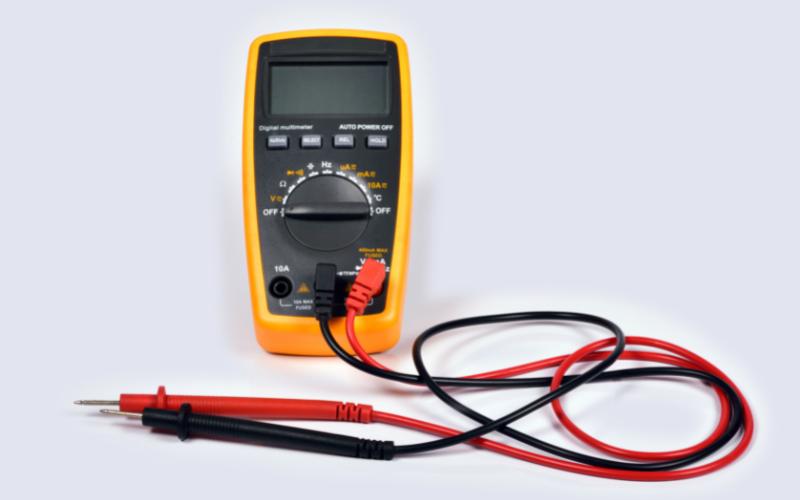
A multimeter helps to get an accurate reading of current in any wire. It also helps to confirm that no current is flowing throw wires while any electrical work is being done.
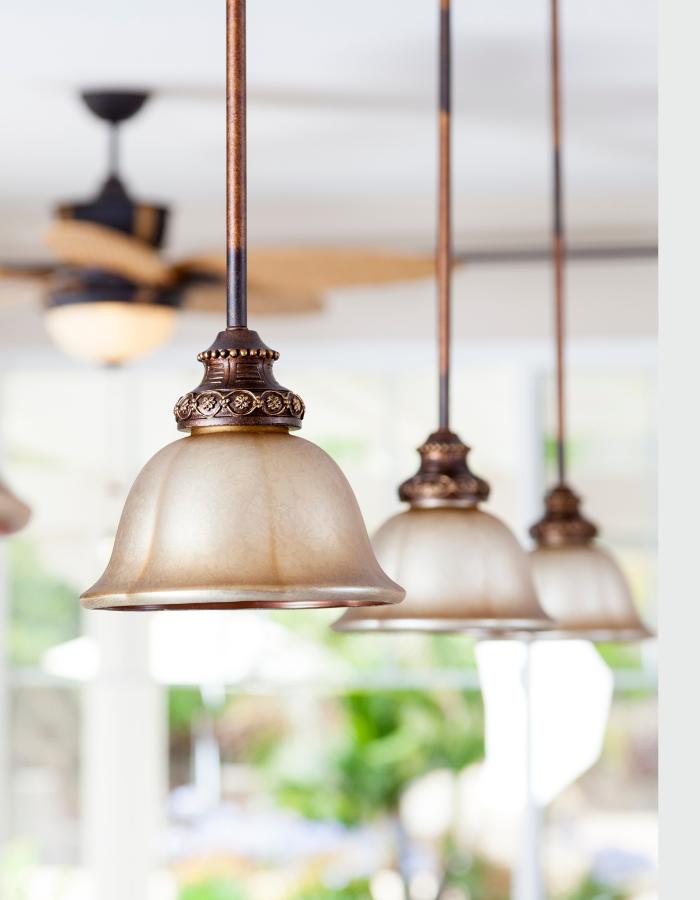
Light fixture
Let’s start updating old kitchen lighting.
Update in old kitchen lighting can be made by replacing the old light fixture with new kind of light fixtures or by introducing a totally new light fixture in the kitchen.
We’ll discuss both these ways of updating old kitchen lighting in detail.
METHOD 1 .
ADDING NEW LIGHTS ON THE CEILING OF KITCHEN
1/3
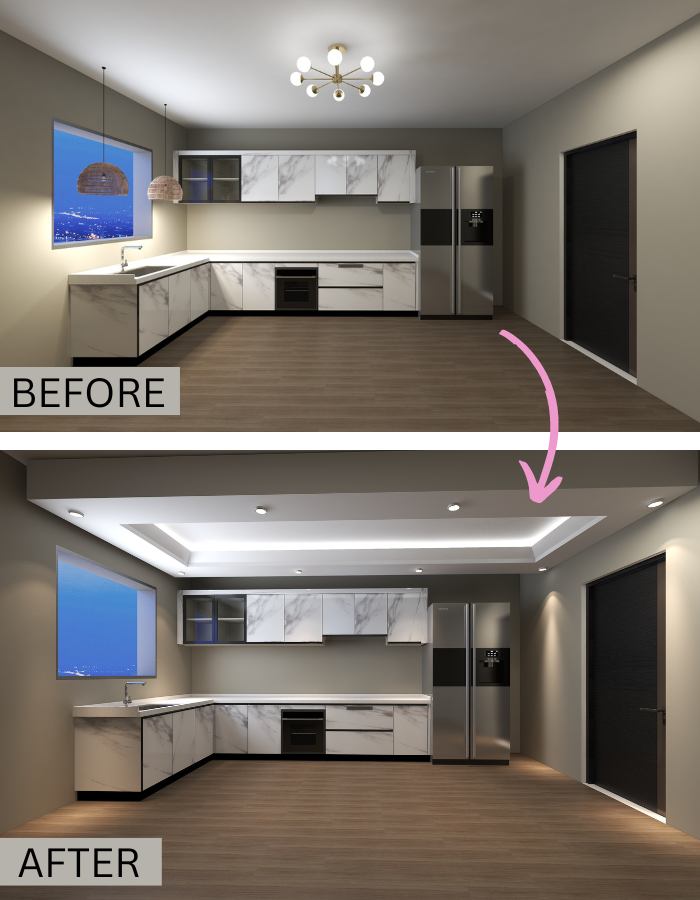
Replacing old light fixtures on ceiling with a false ceiling.
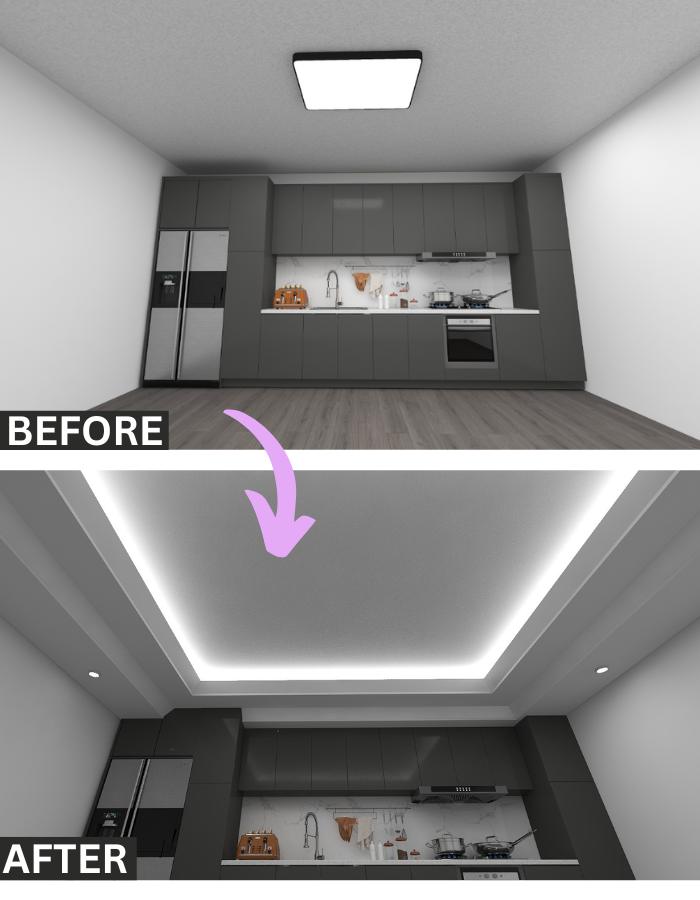
There are two ways to add new lights on ceiling of kitchen i.e either by
- Drilling the ceiling itself.
- Installing a layer of false ceiling.
The kitchen would retain the characteristics of its old look even if new lights are installed directly on the ceiling
Hence installing a false ceiling is a much better approach.
Generally speaking there are two types of false ceiling designs for kitchen.
- Design with a groove or gap in the centre
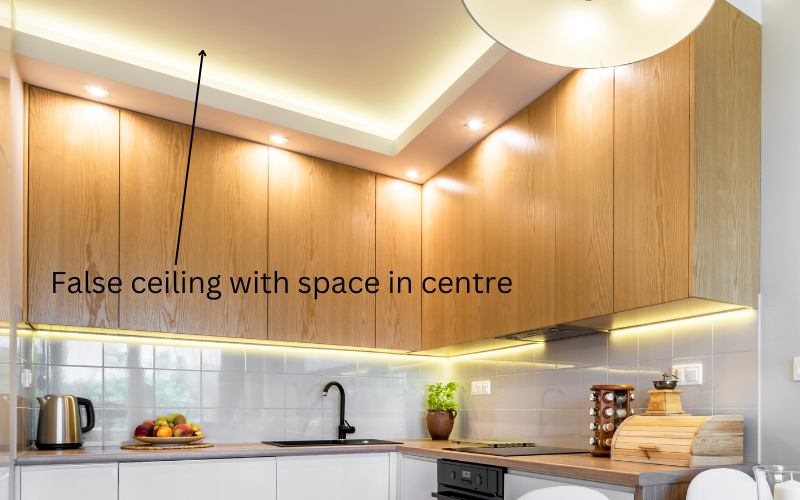
- Design that is flat from the centre
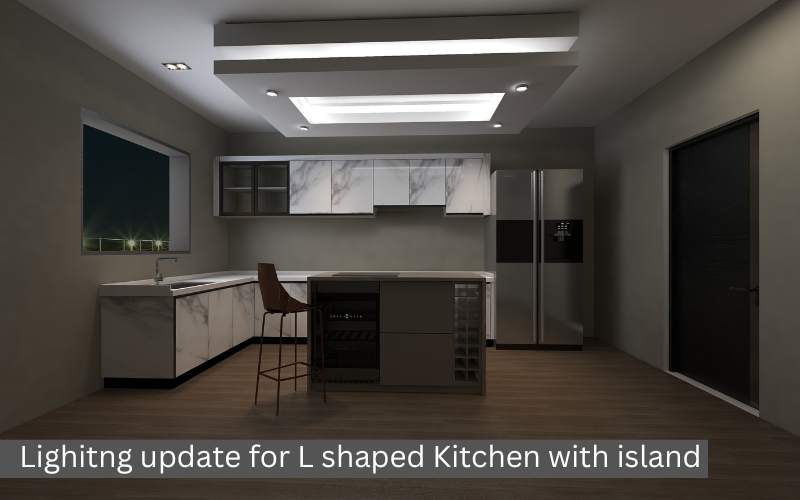
Choosing false ceiling design based on presence of island in kitchen :
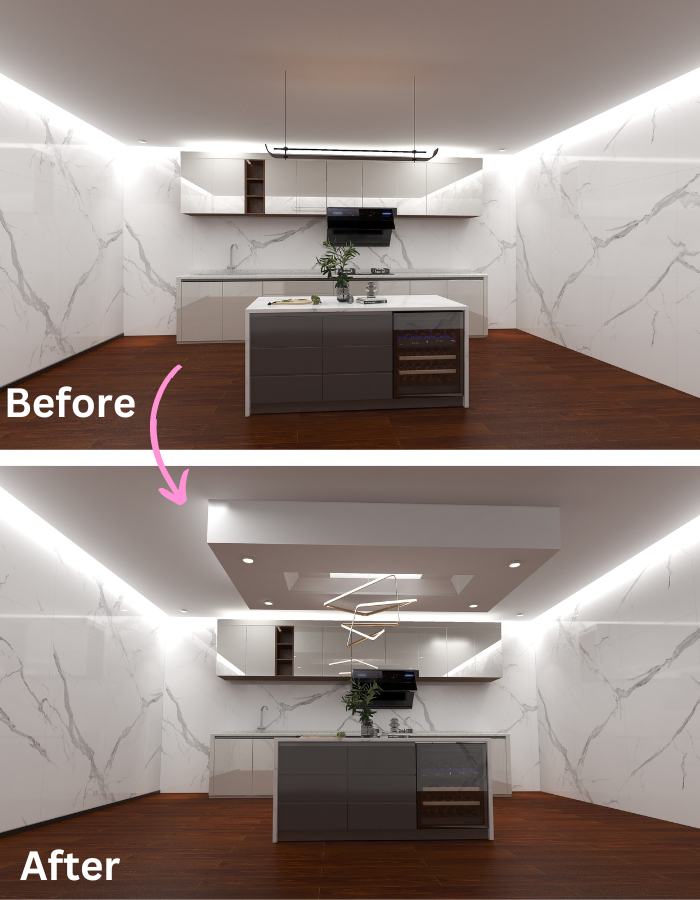
If there is an island in the kitchen then the false ceiling installed for updating the lighting should be highlighting the island.
This can be achieved by either making the false ceiling only around the dimensions of island or if false ceiling has to cover the entire ceiling then there should be hanging light fixtures used over the island from the false ceiling.
A false ceiling with a flat design look good when no hanging lights are to be used whereas if hanging lights are to be used over island then a false ceiling design with a groove in the centre looks comparatively good.
Method 2
Replacing existing light sources with new and different ones
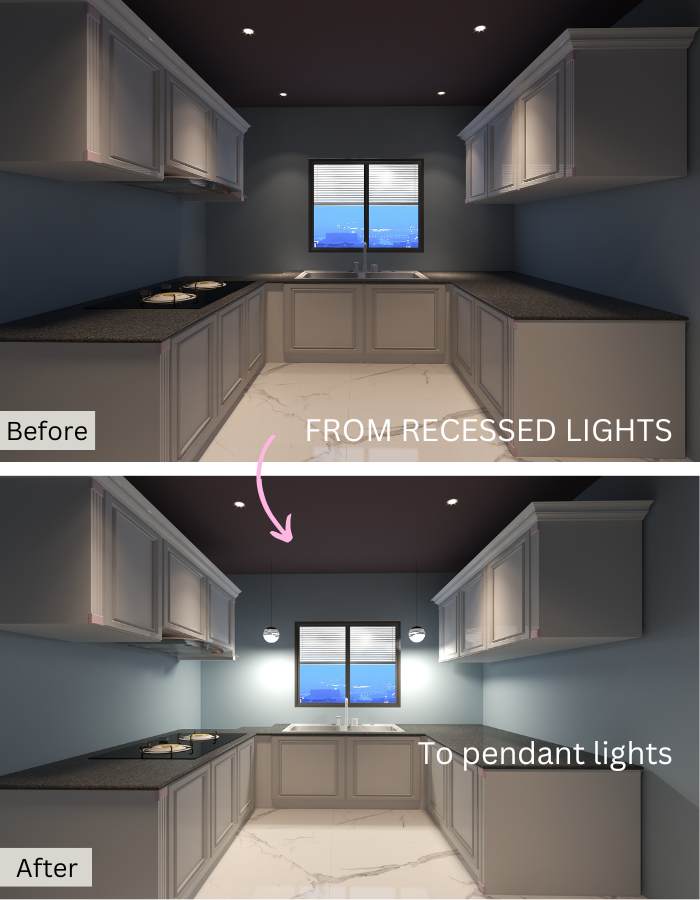
In the old lighting design if recessed lights were used to illuminate the sink then in updated kitchen lighting, the existing recessed lights can be removed and that space can be used to add pendant lights.
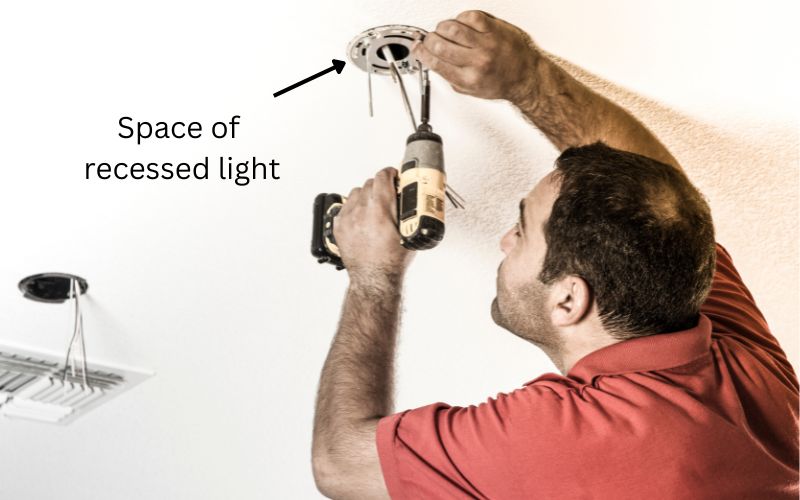
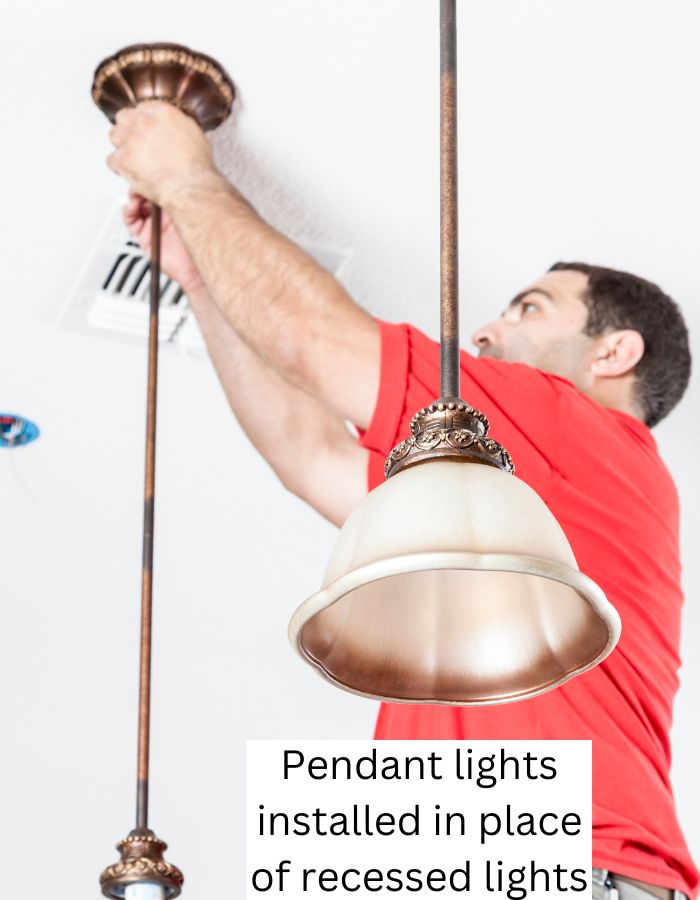
Not only pendant lights but track lights can also be installed in the space of recessed lights. Similarly opposite can also be done i.e if track lights or pendant lights are in use already then in the new lighting design recessed lights can be use in their space.
Here’s a detailed demonstration on how to install pendant lights in the space of recessed lights on the ceiling
To summarize,
While replacing existing recessed lights with pendant lights simply make sure that
- The size of recessed lights on the ceiling is equal or smaller than the base plate of pendant light.
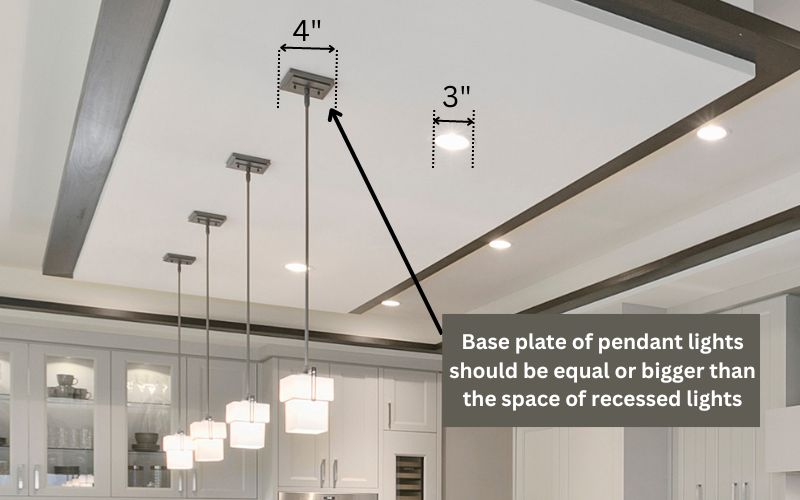
- After turning off the power supply, match the wiring of new light fixture with the power outlet on the ceiling.
i.e the hot wire from the power outlet should be connected with the hot wire of the light fixture, similarly, neutral wires from both the outlet and the light fixture should match with each other.
How to find the best lighting upgrade for kitchen
The key point while updating the lighting in the kitchen is that the updated lighting should match and highlight the theme and design of the kitchen.
A kitchen can have a classic theme or a modular theme with varying designs.
Hence the lighting should also be according to the particular features of the kitchen.
Let’s see the entire process of finding the best lighting update for the kitchen in a step-by-step manner.
STEP 1
First of all, observe what kind of theme the kitchen has and what is the design of kitchen.
STEP 2
Using the representations below, match the lighting elements with the features and characteristics of kitchen.
| Kitchen features | Preferred new lighting |
|---|---|
| Old and classic | flush mount lighting. |
| Modern & linear (without island) | Wood grille ceiling with lighting from within |
| Modern & linear (with island) | False ceiling, grille ceiling of any design. |
| Modern & L shaped without island | false ceiling in a rectangular design |
| Modern & L shaped with island | False ceiling with space within for adding a hanging light fixture |
| Modern & U-shaped without island | False ceiling in square design |
| Modern & U shaped with island | false ceiling + chandelier or pendant lights. |
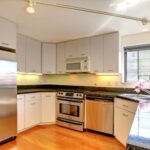
New lighting for old & classic kitchen

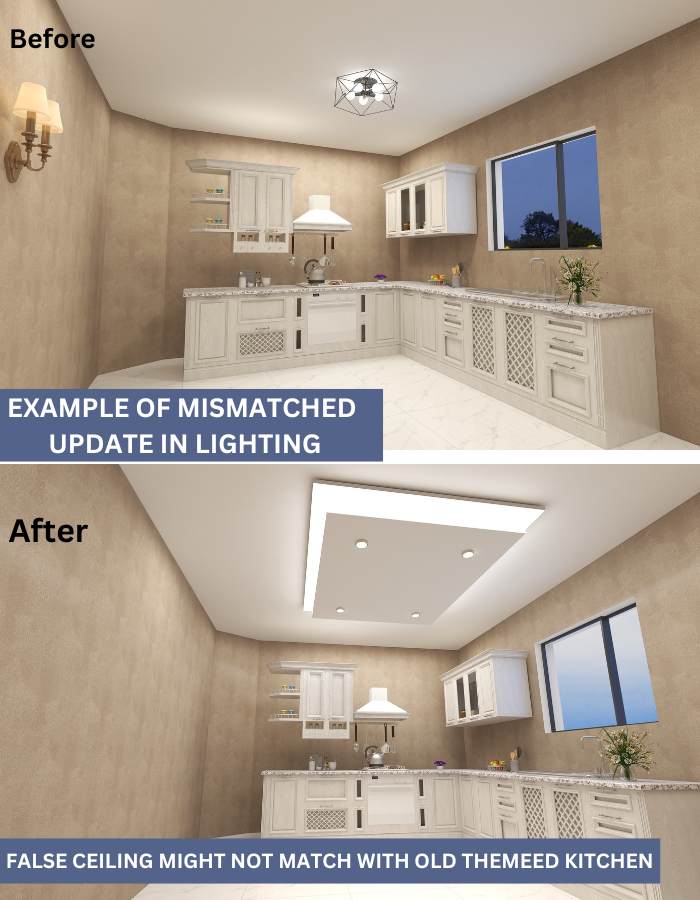
From the above two examples, it is clear that if a false ceiling design is incorporated into an old classic kitchen, the lighting and characteristics of the kitchen appear not to be in harmony.
Therefore, the lighting update on the ceiling of an old kitchen should be clean and give a flush look. Flush mount and semi flush mount light fixture are great to get a seamless lighting design for old style kitchen.
If hanging lights or wall mounted lights are used then such light fixtures should carry the same classical theme of the kitchen. Ultimately, using them may not provide the look of a new and fresh lighting design.
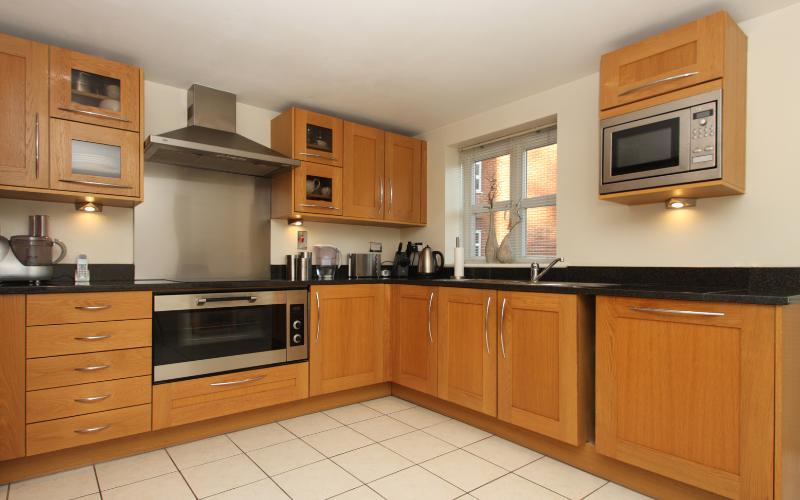
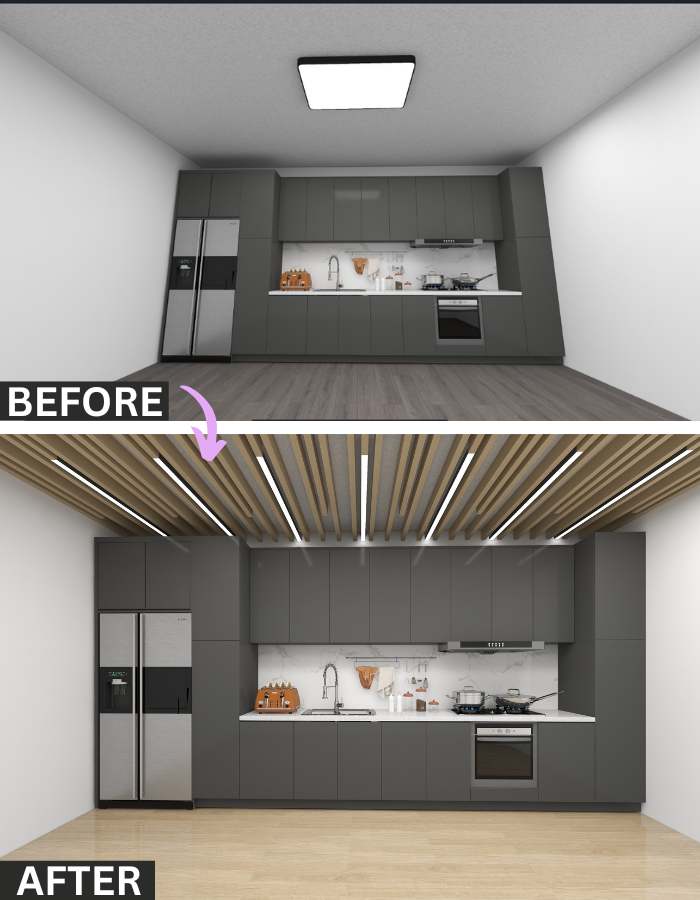
Modern Linear Kitchen
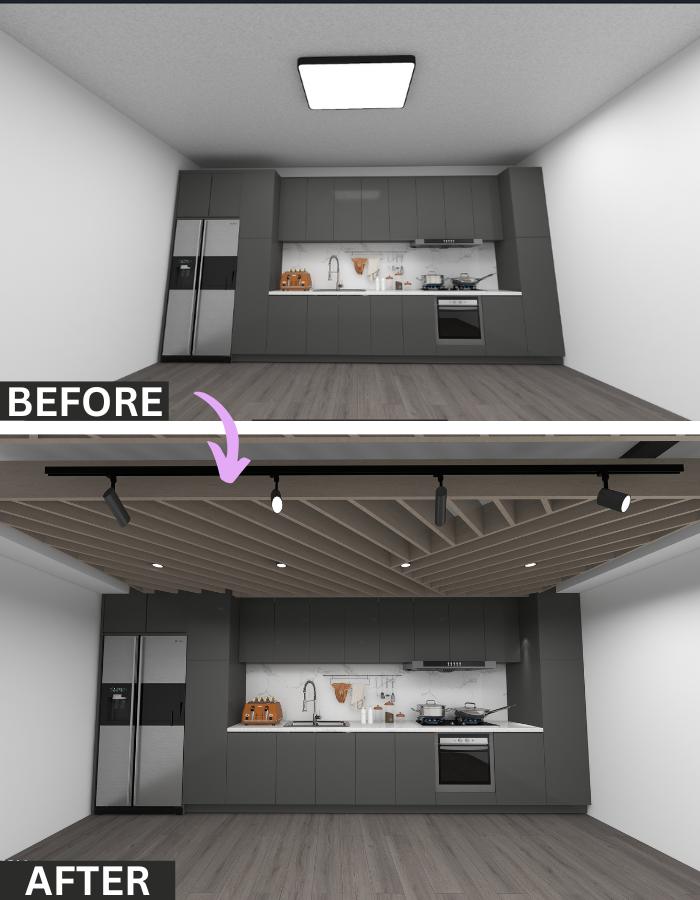
A modern linear kitchen without an island can be given a fresh look by adding a false ceiling or a wooden grille ceiling design with light fixtures installed within the ceiling design.
Track lights, spot downlights, profile lights are some of the light fixtures that can be used with a grille ceiling to provide ambient lighting to the kitchen.
Simplest way to install a grille ceiling in kitchen.
The Grille ceiling can be made of both drywall as well as wood. If heavy light fixtures are to be installed within the grille ceiling then wood should be preferred else for normal use drywall should be preferred.
Demonstration of grille ceiling.
STEP 1 :
Prepare the outer frame for the grille ceiling.
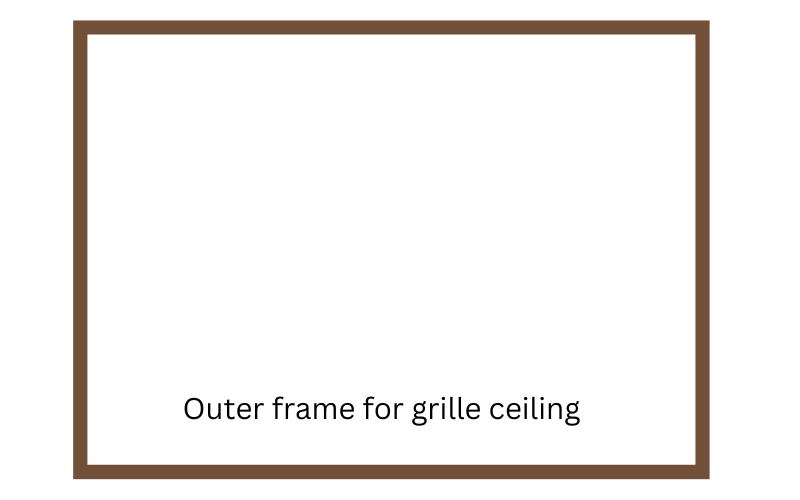
Simply measure the dimensions of the existing ceiling of the kitchen. Since wooden panels also have some girth, subtract the girth of the wooden panel to the actual length and width of the ceiling to get the exact size of outer frame.
STEP 2 :
Add a resting pad for wooden grille panels on the outer frame.
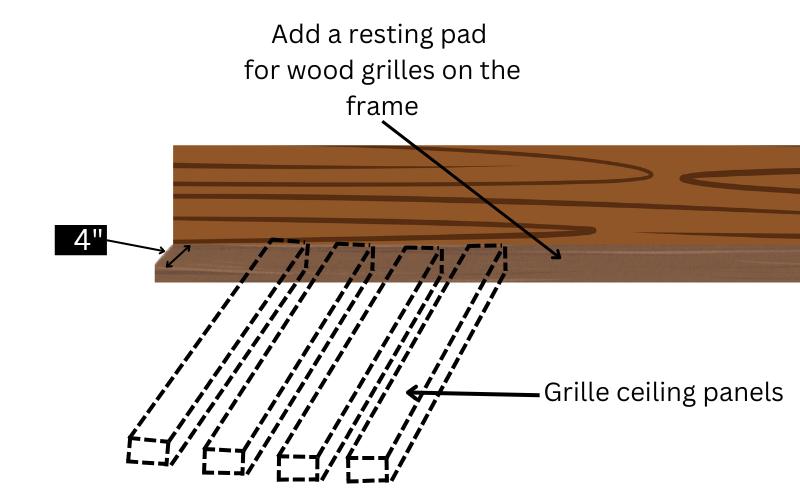
The actual design element of grille ceiling are the individual panels that are attached to the main frame. Now there are two ways to attach these panels with the frame.
Either by adding a resting pad for the panels or by attaching a metal mounting strip on the outer frame for the panels. The use of metal mounting strip has been demonstrated in the video above.
STEP 3 :
ASSORT ALL THE PANELS IN THE DESIRED DESIGN AND MAKE SPACE TO ADD LIGHT FIXTURES
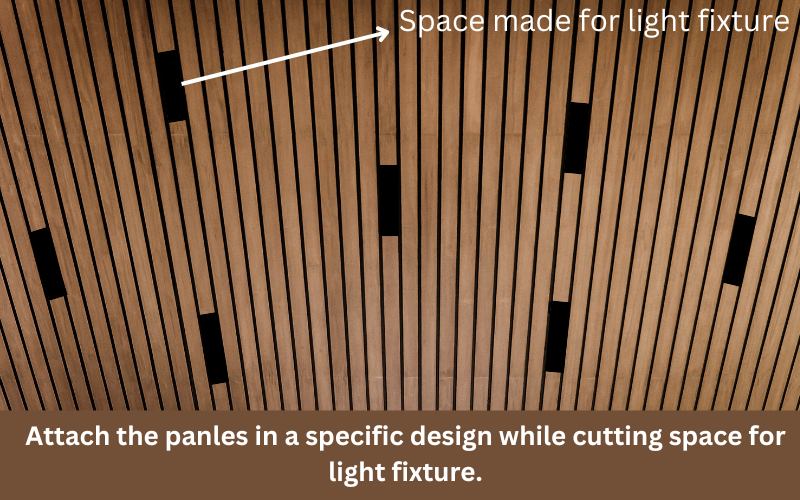
Before attaching the grille ceiling with the actual ceiling all the panels should be placed in according the design and then holes are cut of the exact size as that of light fixtures.
After making space for light fixture the final step is the make he electrical connections and fix the grille ceiling above kitchen.
Prepare & attach grille ceiling in parts for easy installing of panels and ease of making electrial connections
.
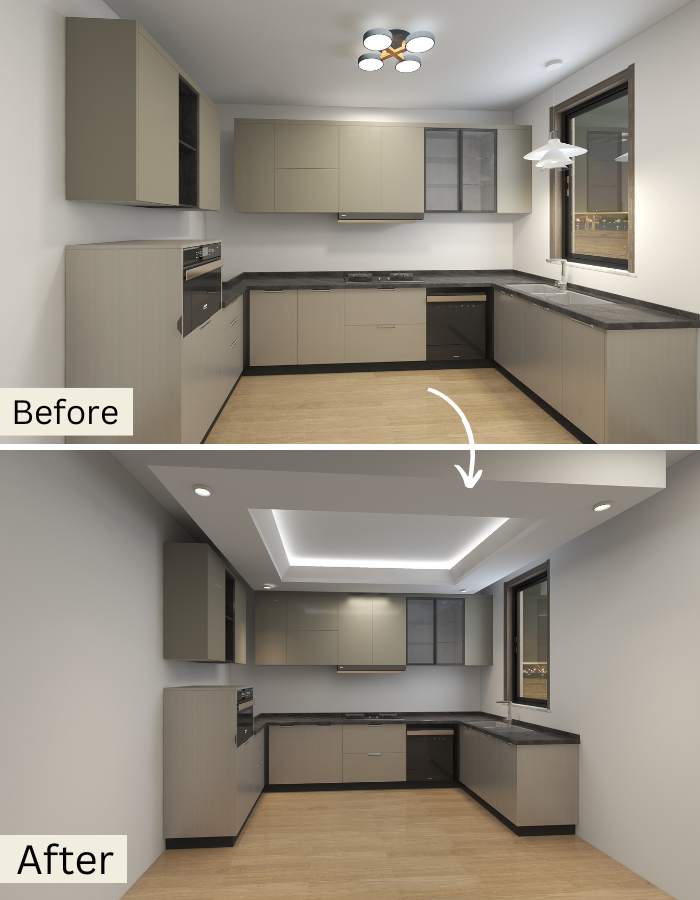
MODERN L SHAPED KITCHEN
The reason for adding a rectangular false ceiling design in L shaped kitchen without island is that recessed lights added in the rectangular false ceiling cast some lights to the task areas as well which in a squarish false ceiling design would cast on top of cabinets.
Also an L-shaped kitchen may have a different size on each side. Unless the length and the width of the kitchen are not identical, a squarish false ceiling design should not be used in L shaped kitchen with no island.
L-shaped kitchen with island
Island lighting in an L shaped kitchen with island can easily be updated by addding a hanging light fixture over the island or by adding a false ceiling of the shape of island.
In false ceiling there should be space left for adding an additinal hanging light fixture over the island.
MODERN U SHAPED KITCHEN
Either a rectangular or a squarish false ceiling design can be used to update lighting in a U shaped kitchen.
Since the light from the false ceiling should fall on task areas also, a squarish false ceiling design for a normal size U shaped kitchen (with length and width almost similar) allows smooth and precise integration of light sources.
If the dimensions of a U shaped kitchen are somewhat rectangular, then it is a good choice to add a rectangular false ceiling design for lighting update.
LIGHTING REMODELING PROCESS
Process of making false ceiling for kitchen
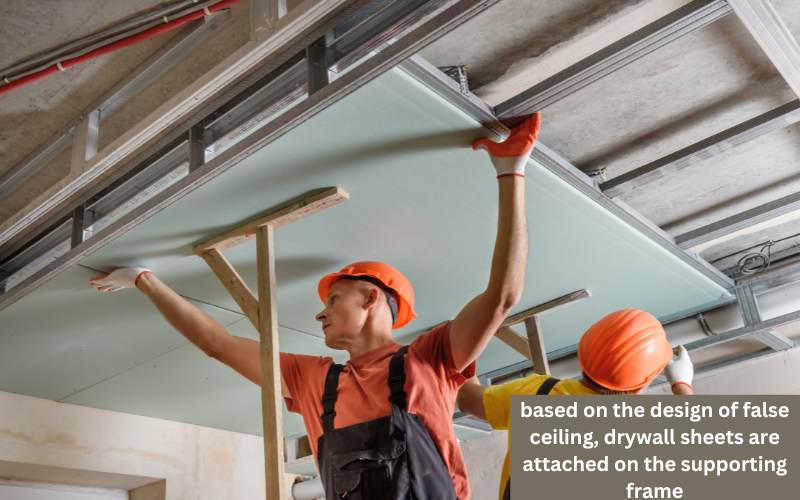
The first thing to do while making a false ceiling for kitchen is to prepare the suppporting frame for false ceiling.
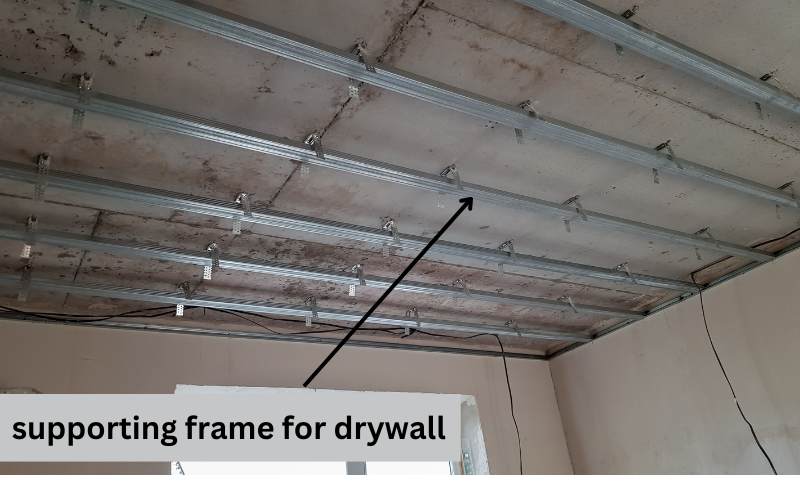
It is on this frame that the drywall false ceiling is attached to. The design of supporting frame decides the design of finished false ceiling.
The supporting frame can be made with the help of wooden panels or gypsum panels.
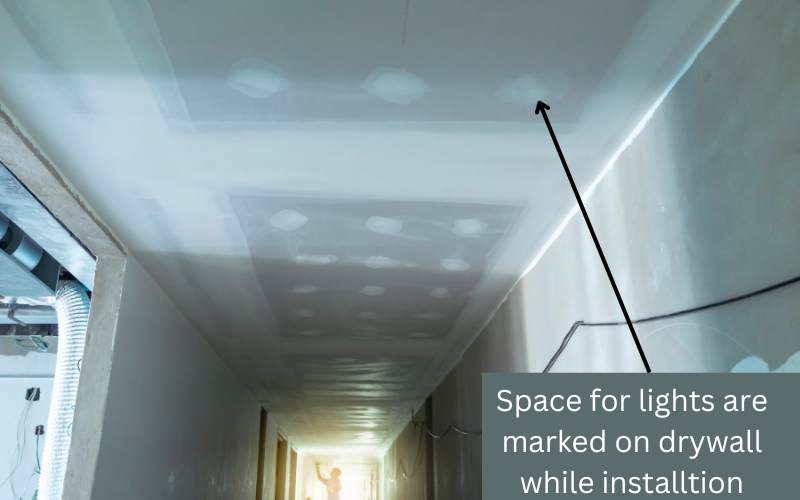
After a aprticular sheet of drywall is attached, certain markings on the sheet should be made to mark the hollow space within the actual ceiling and false ceiling.
This marking will help to avoid the supporting frame getting drilled while installing lights withing the false ceiling.
Process of Updating undercabinet lighting
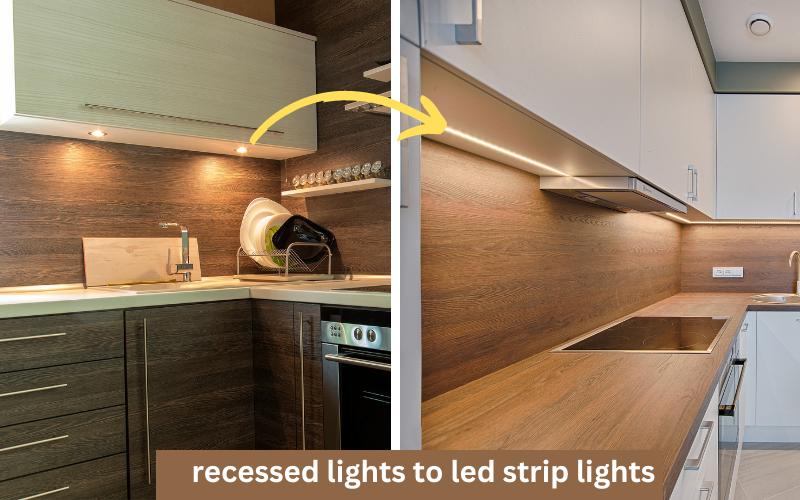
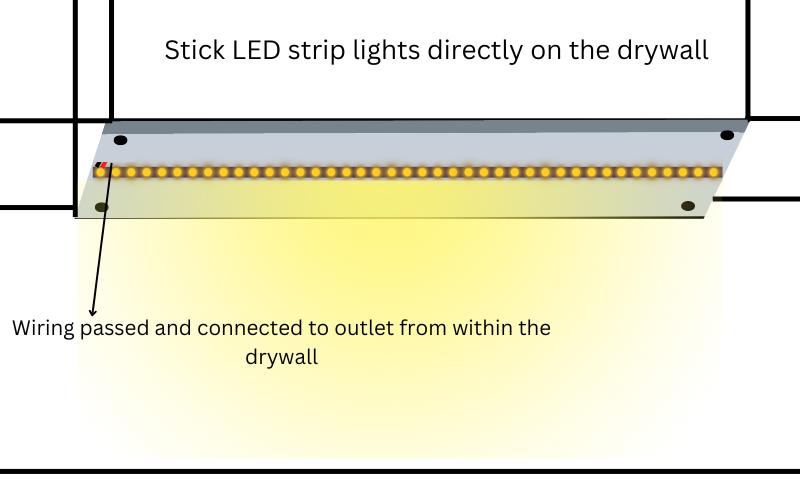
Since the bottom of the cabinet is not visible, LED strip lights can be directly sticked to the cabinets after recessed lights have been removed.
Or for a clean look, the cavity of recessed lights can be filled with a wider profile and in the profile, LED strip lights can be used. Alternatively, the entire bottom of the cabinets can be covered by a sheet of drywall to cover the holes left by recessed lights.
Below is a graphic representation of the entire process of updating undercabinet lighting.
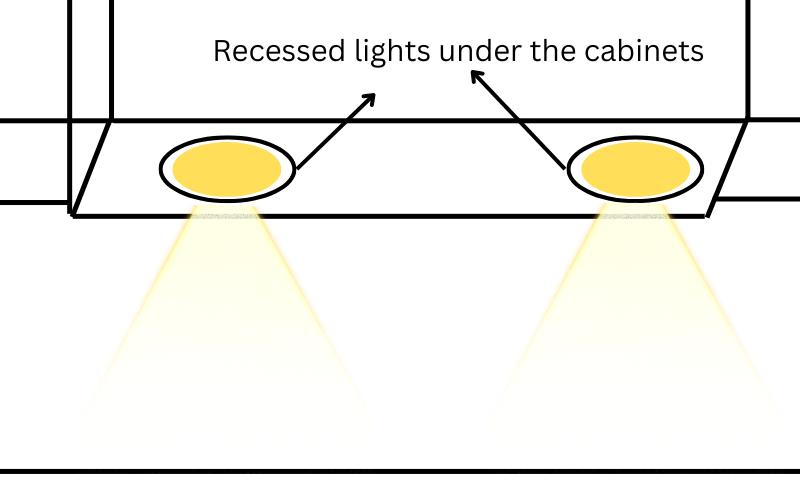
Step 1 : TAKE OUT THE EXISTING RECESSED LIGHTS
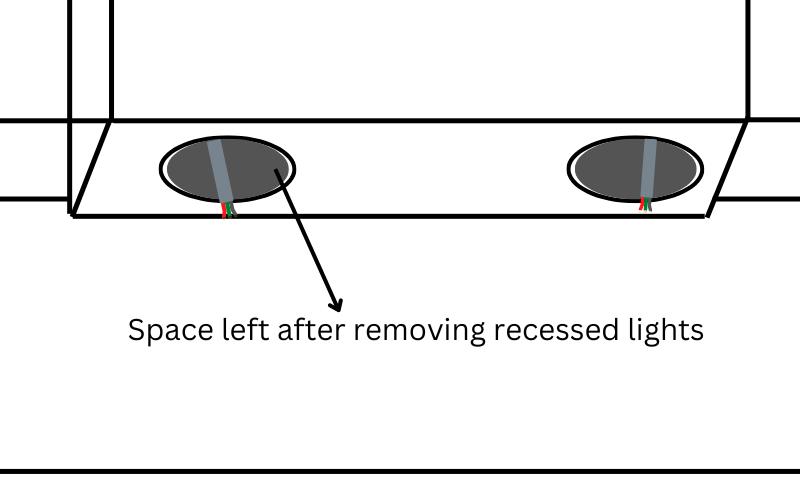
The process of taking out a recessed light is simple. First, turn off the power from the main panel and then simply pull the edges of recessed lights downwards.
By doing so the recessed light would come out easily.
see this video below from 0:49
STEP 2 : INSTALL A SHEET OF DRYWALL TO COVER UP THE EMPTY HOLES.
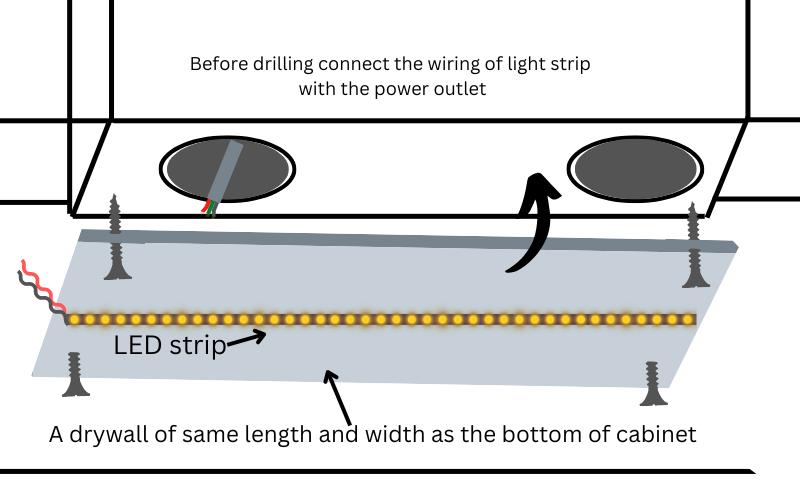
Before adding a sheet of drywall over the holes the wiring from the power outlet and that of new light source are connected.
Here’s a video on how to install profile lighting under the cabinets